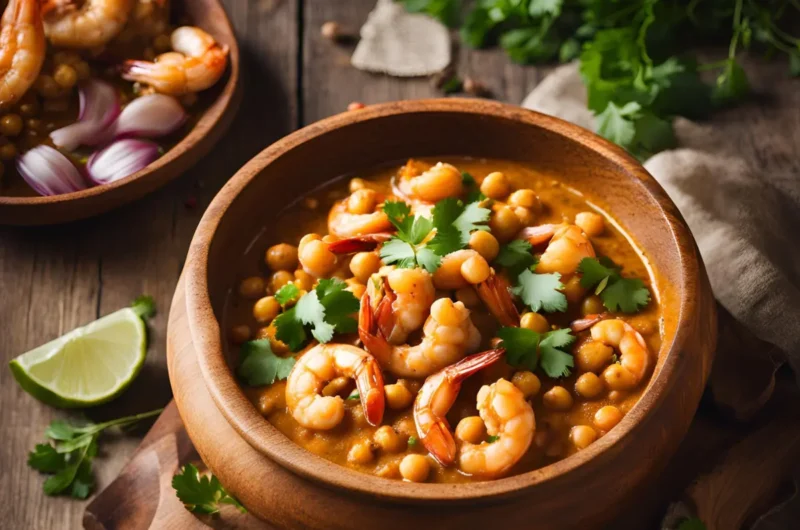
Shrimp And Chickpea Curry: Unleash Bold Flavors Tonight!
When it comes to comfort food, few dishes can compete with a warm, hearty curry. One of my all-time favorites is shrimp and chickpea curry. This dish is not only delicious but also packed with nutrients, making it a perfect choice for a weeknight dinner or a special occasion. The combination of tender shrimp and creamy chickpeas creates a delightful texture, while the spices bring a burst of flavor that warms the soul. In this blog post, I’ll take you through my personal journey of making shrimp and chickpea curry, sharing tips, tricks, and my experiences along the way.
Ingredients Preparation
- Shrimp: Start by cleaning and deveining your shrimp. I usually buy fresh shrimp, but frozen shrimp works just as well. If you’re using frozen shrimp, make sure to thaw them in advance. To clean them, simply remove the shell and the dark vein running along the back. Rinse them under cold water and blot dry with a paper towel. This step is crucial because it helps the shrimp absorb the flavors of the curry better.
- Chickpeas: You can use canned chickpeas for convenience, or if you prefer, dried chickpeas. If you choose dried, soak them overnight in water to soften them. Drain and rinse the following day before incorporating them into the curry. I love using chickpeas in this dish because they add a hearty texture and are a great source of protein.
- Vegetables: Chop your onions, garlic, and ginger. I like to use a medium onion, a couple of cloves of garlic, and a small piece of ginger. The aroma of these ingredients sautéing in the pan is simply irresistible. For added nourishment, you can also include other veggies like spinach or bell peppers.
- Spices: Measure out your spices. For this shrimp and chickpea curry, I typically use curry powder, cumin, turmeric, and a pinch of cayenne for heat. The combination of these spices creates a rich and aromatic base for the dish.
Equipment Needed
- A large cooking pot or skillet: This is where all the magic happens.
- A knife and cutting board: For chopping your vegetables and shrimp.
- Measuring cups and spoons: To ensure you get the right amounts of spices and ingredients.
- A stirring spoon: To mix everything together as it cooks.
Cooking Instructions
Step 1: Sautéing Aromatics
In your saucepan, start by heating a few teaspoons of oil over medium heat.To the hot oil, add the chopped onions. They should become transparent after about five minutes of sautéing. Next, add the grated ginger and minced garlic.The smell that fills your kitchen at this point is heavenly! Continue to cook, stirring often to avoid scorching, for another minute.
Step 2: Adding Spices
Next, it’s time to add the spices. Add your cayenne pepper, turmeric, cumin, and curry powder. Allow the spices to simmer for approximately two minutes after stirring everything together. This step is crucial because it allows the spices to release their essential oils, enhancing the flavor of your shrimp and chickpea curry. You’ll notice the vibrant colors and aromas coming together beautifully.
Step 3: Cooking The Chickpeas
Now, add your chickpeas to the pot. If you’re using canned chickpeas, make sure to drain and rinse them first. Make sure they are thoroughly covered by stirring them into the spice mixture.If you’re using soaked dried chickpeas, add them now along with enough water or broth to cover them.For ten to fifteen minutes, let the mixture simmer slowly. This allows the chickpeas to absorb the flavors of the spices.
Step 4: Adding Shrimp
Once the chickpeas are tender, it’s time to add the star of the show: the shrimp! Make sure the shrimp are completely immersed in the curry sauce by gently folding them in. Cook until the shrimp are opaque and pink, about 5 to 7 minutes. Avoid overcooking them as this may cause them to turn rubbery.The moment you see the shrimp change color, you know your shrimp and chickpea curry is almost ready!
Step 5: Final Adjustments
To finish off your curry, you can add a splash of coconut milk or broth for a creamier texture. After adding it, simmer for a further two to three minutes. If necessary, add more salt and pepper to the curry after tasting it. I always find that a little squeeze of lime juice at the end brightens up the flavors beautifully. Your shrimp and chickpea curry should now be rich, flavorful, and ready to serve!
Serving Suggestions
When it comes to serving your shrimp and chickpea curry, there are plenty of delicious options. I love pairing it with fluffy basmati rice, which soaks up the flavorful sauce perfectly. Naan bread is another fantastic choice, allowing you to scoop up the curry with ease. For a fresh touch, consider garnishing your dish with chopped cilantro and lime wedges. This improves the flavor profile overall and provides a splash of color.
Conclusion
In conclusion, making shrimp and chickpea curry is a rewarding experience that brings together vibrant flavors and comforting textures. Whether you’re cooking for yourself or sharing with loved ones, this dish is sure to impress. I encourage you to try this recipe and make it your own by adding your favorite vegetables or adjusting the spices to suit your taste. Don’t forget to share your experiences and any variations you come up with—I’d love to hear how your shrimp and chickpea curry turns out!
FAQS
Why is chickpea curry good for you?
Chickpea curry is packed with nutrients, including protein, fiber, vitamins, and minerals. The combination of chickpeas and spices can aid digestion, support heart health, and provide sustained energy, making it a wholesome meal option.
Is chickpea curry high in carbs?
Yes, chickpea curry is relatively high in carbohydrates due to the chickpeas, which are a legume. However, they are complex carbohydrates that provide lasting energy and are accompanied by fiber, which helps regulate blood sugar levels.
How do you soften canned chickpeas for curry?
Canned chickpeas are already cooked and soft, so they don’t require additional softening. Simply drain and rinse them before adding them to your curry to remove excess sodium and improve their texture.
How do you thicken chickpea curry?
To thicken chickpea curry, you can mash some of the chickpeas against the side of the pot or add a slurry made from cornstarch and water. Alternatively, simmering the curry uncovered for a few minutes allows excess liquid to evaporate, naturally thickening the sauce.
Shrimp And Chickpea Curry: Unleash Bold Flavors Tonight!
Course: Main CourseCuisine: Jamaican4
servings15
minutes25
minutes40
minutesShrimp and chickpea curry is a delicious and nutritious dish that combines tender shrimp with hearty chickpeas, all simmered in a rich, aromatic sauce. This flavorful meal is not only satisfying but also packed with protein and fiber, making it a perfect choice for a wholesome dinner.
Ingredients
1 lb shrimp, cleaned and deveined
1 can (15 oz) chickpeas, drained and rinsed (or 1 cup dried chickpeas, soaked overnight)
1 medium onion, chopped
2 cloves garlic, minced
1-inch piece of ginger, grated
2 tablespoons curry powder
1 teaspoon cumin
1 teaspoon turmeric
1/4 teaspoon cayenne pepper (adjust to taste)
1 can (14 oz) coconut milk
2 tablespoons oil (olive or coconut)
Salt and pepper to taste
Fresh cilantro and lime wedges for garnish
Cooked rice or naan for serving
Directions
- Heat the oil in a large pot over medium heat.Add the ginger and garlic when the onions have become transparent.
- Add the spices and simmer until aromatic, about 2 minutes.
- Add chickpeas and enough water or broth to cover. Simmer for 10-15 minutes.
- Add the shrimp and simmer for 5 to 7 minutes, or until pink and opaque.
- Stir in coconut milk and adjust seasoning. Garnish with lime and cilantro and serve with naan or rice.
- Enjoy your cooking adventure with this delightful shrimp and chickpea curry!